
Looking to spruce up your hanging plant game? On a tight gift budget for that too-cool friend who already has everything? Look no further! Search no more! This DIY takes less than an hour, and the end result is sure to impress even the snootiest plant hanger aficionado (Is that a thing? We’re not sure. If it is, they’d be impressed)!
Step 1: Gather materials
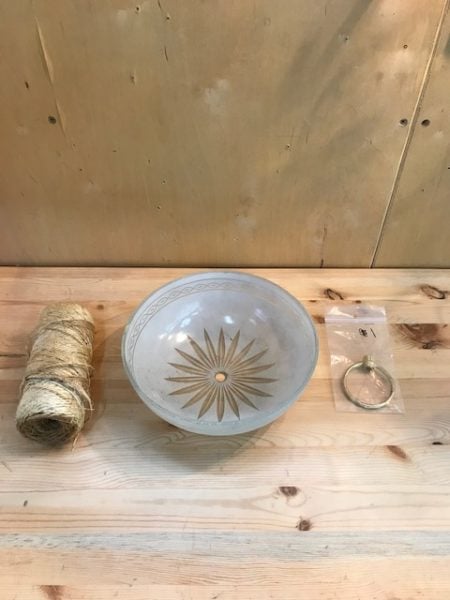
This project utilises only three supplies, each found for a buck at Second Use!
1. Twine (not always available at 2U, but easily purchased at a hardware or craft store)
2. Glass shade with center hole (we’ve got tons of cheap shades right now, all $1-5! This baby was just a buck.)
3. Brass plated loop, found among our extensive light part selection.
In addition to these, you will need scissors, duct tape, a ruler, and some basic braiding abilities. You will want to work on a clean flat surface.
Step 2: Braid away!
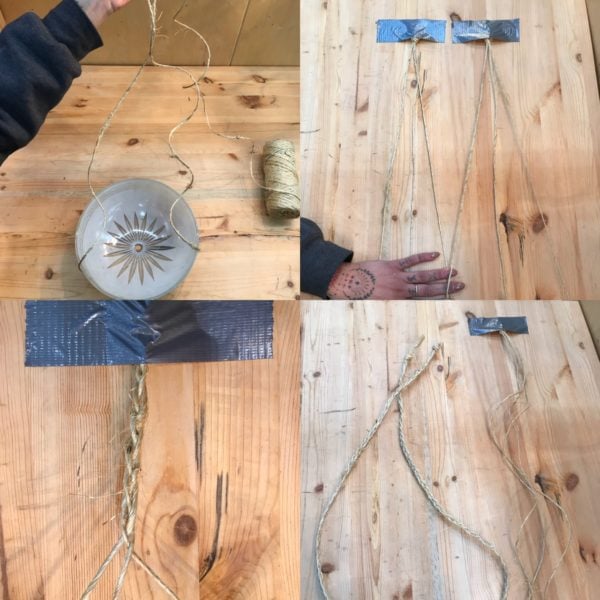
Measure out a length of twine that is slightly longer than twice the length you’d like your planter to hang. Ours was about 56 inches.
Cut six strings to that same length, separate into two sets of three, tie at the top, and tape to your surface. Braid one, and tie off at the end.
Measure your first braid folded in half, and find the center length, aka the halfway point of the entire braid. Ours came out to about 26 inches.
Start your second braid, and stop when it gets to be the halfway length.
Slide the first braid in at the halfway point, and work into the second braid. We wove one strand of braid #2 through braid #1 to make it super secure.
At this point, you should have an x-shaped double braid that nicely supports your shade. Test it out and see where the shade most comfortably sits. You might want to push the shade down to approximate how it will sit once full of dirt and plants.
Get a good grip around the four strands once you’ve gotten the shade pretty evenly centered, and proceed to…
Step 3: Wrapping Up
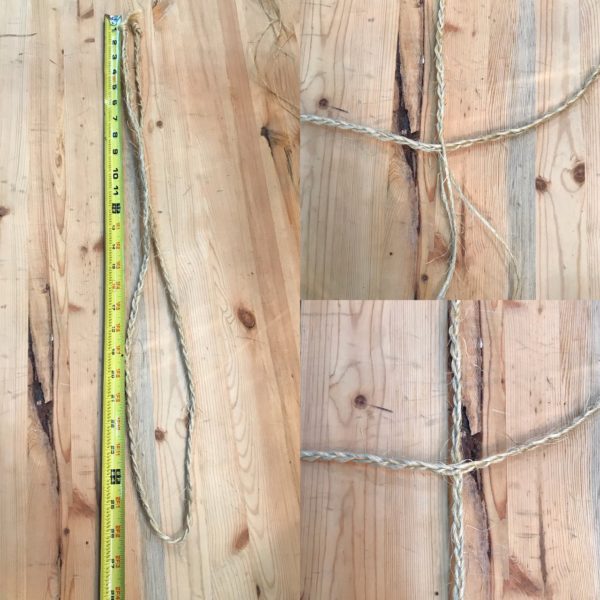
Cut another length of string, about 40 inches long.
Carefully weave through each braid at roughly the same place you were holding them together. It’s ok if this is not perfect!
Once through all four, tie in a knot with about 3 inches of the twine on one end, and the rest ready to wrap around the braids.

With the long end of your new twine, wrap up about an inch around the braids and the short end of the knot you just made.
Then, carefully undo each braid and cut two strands from each short, leaving one long. This will leave you with four strands.
Wrap up about two more inches and tie your extra twine in a knot at the top.
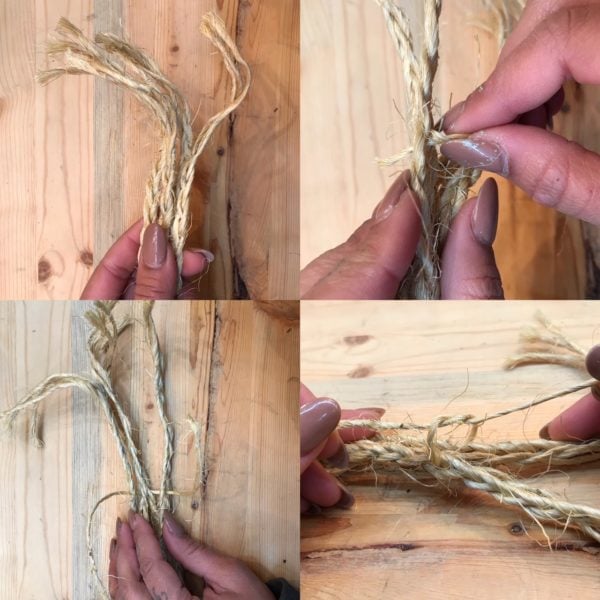
Step 4: Loop-de-Loop

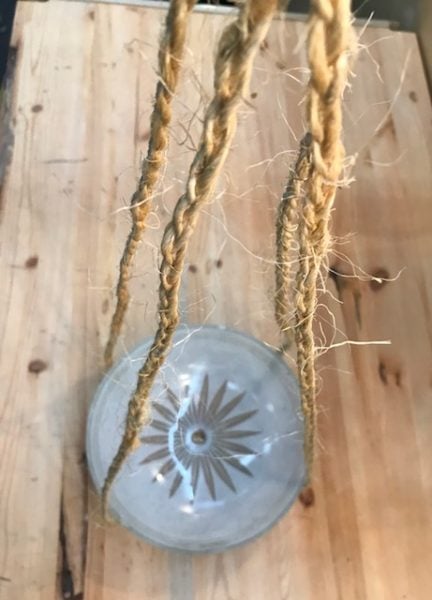
Pull the four remaining strands from the braids through the center hole of your loop, leaving your extra strand out.
Fold down two strands on each side of the loop.
Tie your extra strand around the folded down twine on each side and wrap tightly to cover the loose ends.
This is where it gets…creative. We kept wrapping and knotting until things looked pretty secure and clean. The end result looked something like this:
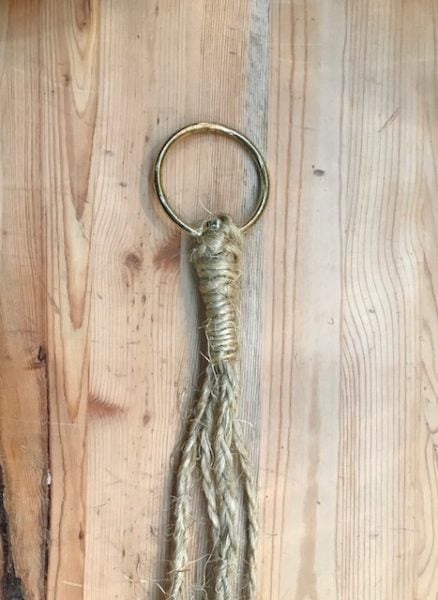
The main thing to make sure of is that the knotted configuration can bear the load of a glass bowl full of dirt. Test the strength by pulling down on it hard. If nothing moves, you should be good to go!
If you’re not satisfied with the appearance of the wrapped top, you can always slip some fabric or large beads over it!
Step 5: Bask in the Glory
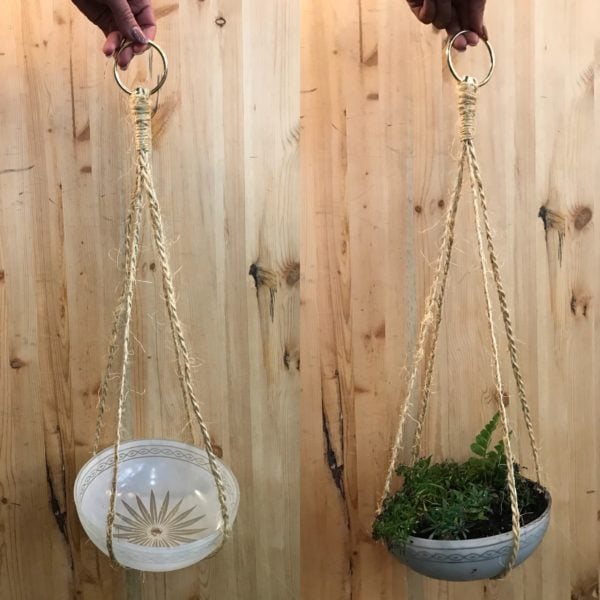
Here’s our final product! Sophisticated, chic, just the right amount of DIY ruggedness. And it only cost you $3!
If you’re not looking to do it all yourself this holiday season, make sure to check out our Handmade Holiday Market on Saturday December 9th for lots of hand-crafted goodies!


