
From Eye Rolls To Epoxy Pours – by Sagar
I shouted “That’s the one!”, while my wife shooshed me rolling her beautiful eyes that scanned the Second Use warehouse from floor to ceiling. My eyes were locked on a more attractive, curvy, and unusual piece of $45 live-edge maple lumber. When I think about it now, I can’t explain why I liked it. Perhaps because it was honest and sincere. A glimpse of the future went by my eyes, my hands gliding over the 2000 Grit sanded black epoxy surface without any bumps, and my hot coffee mug elegantly placed on a coaster made of cork imported from Portugal. My visions were quickly interrupted by my wife “Are you sure you can build it? I don’t want another lumber nesting in the garage”. I said “Absolutely!” and it just took 2 years to finally get to this project while I tried to convince my wife that live edge wood takes years to get acclimated to our home.
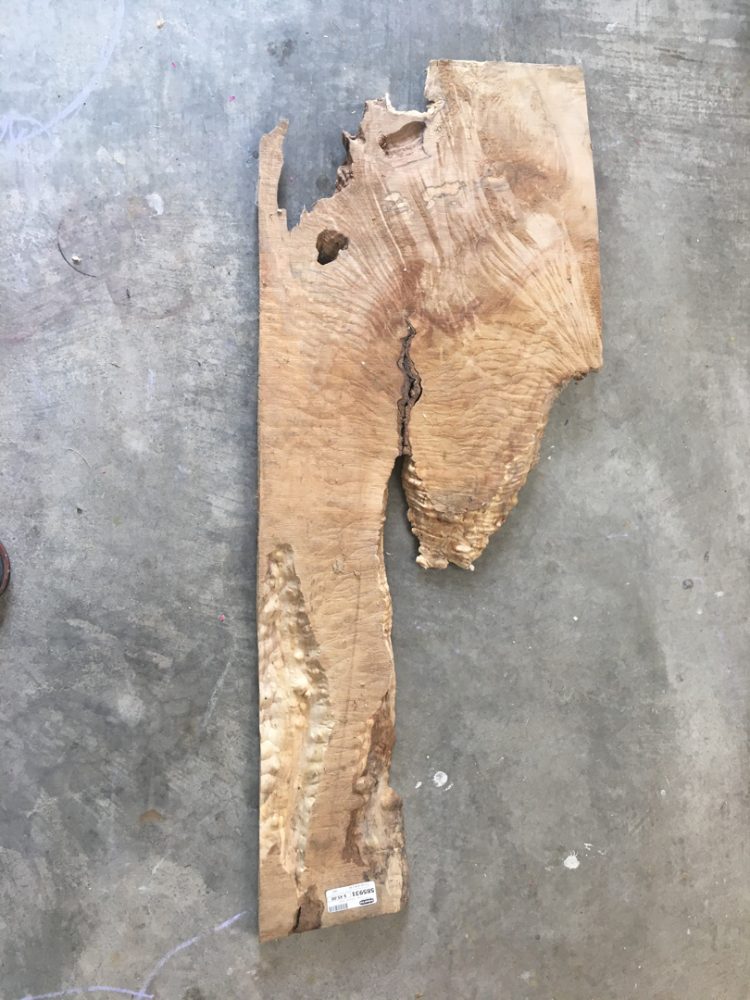
When I finally got the chance, I placed it on the garage floor and stared at it for about 20 mins to appreciate the beauty but also because I was looking like a deer in headlights scratching the leftover hairs on my bald head. While I came to the realization that the live edge slab I bought is really small to make it a great center table, to justify my previous lecture to my wife about why we should build our own center table, and why we should buy epoxy in advance, I had to do something to save my face. So, instead of making a canal pour, I decided to do a Mississippi River pour. I carefully unwrapped the bark, used a wire brush on the angle grinder, and went crazy to make sure I look like a pro making some noise in the driveway.
Anyways, I cut the pieces using my track saw and placed the pieces that looked balanced.

Next, I created a simple plywood tray to hold the pieces and epoxy together and wrapped everything with Tuck tape to ensure that the Epoxy doesn’t stick to the tray. I also wrapped a few scrap pieces of wood and clamped them to the tray to ensure that the pieces doesn’t float/move after the epoxy is poured.

I used Crystal Clear epoxy and TransTint Black dye from Amazon and as the slab was just 1 1/2″ thick, I decided to do it one pour. It was time! I asked my wife to record this historic moment – the first epoxy pour. As soon as I poured and gave a big smile to the camera, smoke, and bubbles started coming from the pour! With a fake grin, I started scrambling to understand what was going on. I quickly brought all the table fans I had in the house and set them on high facing the epoxy. The temperature started coming down, but I started seeing some cracks in the pour. Once it started cooling down, I realized those were just surface cracks and nothing serious. I did a little show off by using the blow torch to get rid of the bubbles, unfortunately, my wife quickly pointed out that she was sitting next to me the other day while I was watching Blacktail Studio getting rid of the bubbles in his ginormous epoxy table pour. I later realized that I didn’t purchase the deep pour epoxy and had gone with the regular one due to the habit of picking the cheapest option that Amazon had recommended.

Once cured, it was time to plane that slab, but wait! There was no way it would fit in the standard benchtop thickness planer. So, I quickly made a router surface planing jig using a 3/4″ flattening bit on my Makita cordless palm router and leveled it out. The epoxy was softer than what I had imagined. It was easy, but really messy as they make plastic noodles instead of chips and they stick everywhere unless you have got an anti-static vacuum hose.

I did enjoy sanding through various grits (120, 220, 320) while listening to Odesza live on KEXP. I didn’t want a crazy mirror finish. So, I just stopped there. OSMO Polyx-Oil is what I picked as the finish, as that gave me a reason to buy that 14th can of finish that I always wanted but my wife never approved. It was super easy to apply and the contrast in the wood came out really well.

I got a blank stare when I said “I’m thinking of making these really cool legs” and pointed at my “Ultimate contemporary table legs” board on Pinterest. So, I got the message and started looking to purchase a pair of legs to put it on. Blacktail Studio’s Youtube channel came to the rescue when I saw him talking about Flowy Line Designs and how much he liked it. So, I found them on Etsy and looked through their options. We collectively agreed that if we could imagine those table legs with our live slab in our heads, we would be guests on Chip and Joanne’s show on HGTV. So, I called out to my inner Photoshop Gods to mask those table legs from Etsy to the actual slab to see how they’d roughly look. We went with the option on the bottom left that looked balanced to our eyes.

When the table legs got delivered after a few weeks, it felt like opening gifts on Christmas morning, except that I had to pay for them. Anyways, the black metal legs were beautifully made with powder-coated paint. Though we had narrowed it down to these particular legs, I still had to determine which way they should face and how far or closer they should be. So, I placed the slab temporarily on the legs with varying distances and directions and took pictures. Once I got approval from my wife on the bottom right one, I bolted them on.

As it sat next to my $1000 Article couch, the maple epoxy table had not changed its soul, it still looked honest, and sincere, just as before, but with a hint of added Glamour, perhaps making the couch a little jealous.


